
Sooo, a couple of days ago I heard a small snipped of a song on TV which I remembered that I liked a lot … then I remembered that I actually had a copy of it on tape … yes, TAPE.
Back in the olden days we used to record music on magnetic tape, but I ain’t taking about yrrr typical compact cassette, I’m talking about Digital Audio Tape. Sony introduced DAT in 1987 … it recorded 16-bit digital on magnetic tape and supported recording program numbers and ID’s, which is why it was most common in recording studios. Back in my yuut I had much money, and being a tech geek, I thought paying $600 (I was able to get it at cost price, and it was the lowest consumer model) was great for a digital recorder.

Sooo, back to the story … I rummaged around my tapes and found it … Panic in Detroit, by David Bowie. Great !!! I popped it into my Sony DTC-750 DAT deck and created an MP3 on my MacBook. Hmm, since I am here, lets look for some other songs … and that’s when the problems appeared. It started with not pulling the tape back into the cassette (a DAT loading is like a VHS tape … hmm, not sure how many of you remember those either … the tape gets pulled out and wrapped to a helical scan drum), so when it was ejected it left the tape exposed and crinkled. I realized that there was a problem with the pickup spools not being engaged by the motor properly … or the motor is dying, as FF and RW are very sluggish !!
Well, since I don’t have any cameras that I need to work on (actually, that is a big lie as there are two cameras that need the seals replaced, but I am stalling on that job) I am going try to get this thing working.

I did some presearch on the web to see if this was common or if anyone else had documented taking this thing apart … and I was in luck.
It was not too difficult to get the main part out.
 Looking over the gears, I did not see anything obviously broken.
Stuff turned, moved …
Hmmm, so I put it back together and seated it back in … powered it up, and started watching the mechanisms as it loaded, played, reverse play … ah, there seems to be a problem here.
When the reverse play is engaged, the drive motor does not move … so this causes the pickup spool not to turn … which in turn causes the tape to turn into a pile of spagetti.
 Well, the motor does turn and the belt looks ok … so I am guesing the motor is dying (the thing is 30 years old).
I figured that it probably was not worth it to get a replacement part … so I just sprayed some Lighter Fluid into the openeings, and hope for the best. I thought it would clean out any gunge (even though it would flush any lubricant on any bearings).
Letting it dry, I put it back together and exersized it by FF and RW a tape over and over … well, it appears my bet paid off … now I can sit back, listen, and relive the 80’s.
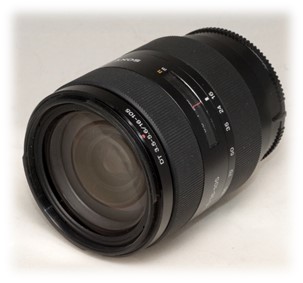 It was described as having a problem with the focusing. It could be used manually, but the auto focus had problems … I made a guess it was something stuck in the focus gears.
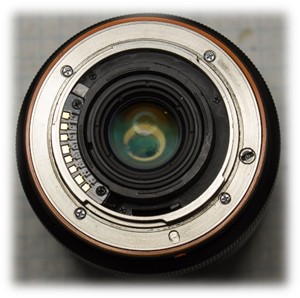 First is to remove the inner ring
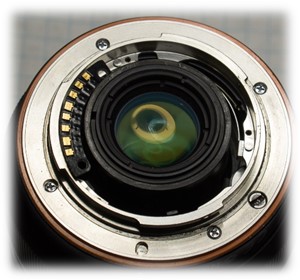 Now you can remove the mounting ring.
 Gently take the shims out.
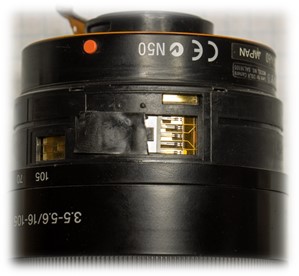 The outer cover (the one with the orange ring) is held on by three screws. You will first need to pull off the rubber zoom grip. This should just slide off with a little work. It is held on by tension … there should be no adhesive.
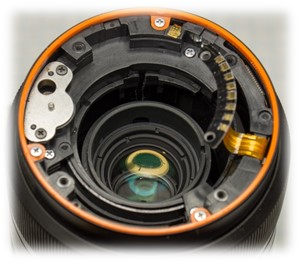 Remove the three screws.
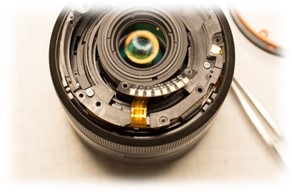 Remove the three screws
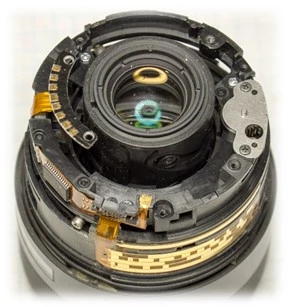 There is one more thing that needs to be done in order to take this layer off.
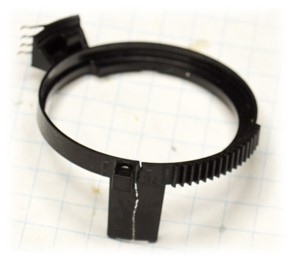 Take the piece that you just removed … sadly, I am missing the picture I took of the inside … Look inside and you will find a ring that looks like this.
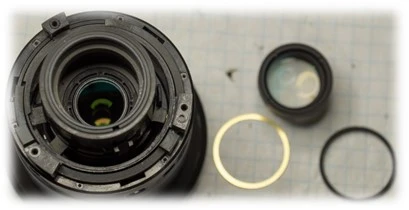 Getting back to the rest of the lens … you should now be left with this.
 So here is my cool red Sony NEX-3, Fotga M39-NEX adapter, and Canon 35mm f/2.8 rangefinder lens.
