Tag Archives: Canon

Posts about Canon photographic equipment

Force Not, learn you must, young Padawan.

So some more broken stuff, a Canon QL17 GIII (again) … I bought this one because it was described as having a problem where the speed was stuck on bulb no matter what it is set on … hmm.

After I got it in my hands I realized that the description was missing a fact … the speed dial could only be turned half way. Well sounds like something is jamming the dial. Time to open it up.

The only difficult part to get deep here is the front lens cell. If you are lucky you can unscrew it with the help of a rubber tool … if you are not, then you need the special Canon tool,

Well, I found the problem … the speed selection dial post is no longer attached, and was jammed against the other dials.

The service manual shows the speed selection dial and the post that engages the speed cam on the shutter (that is lower in the body).

You can see that the top of it is bent … so someone forced the speed dial beyond its limit and popped the rivets holding the post on.

The speed selection dial is designed so that it cannot be over turned unless somebody did that while taking it apart … and I can easily see that this was disassembled before.

Ok, time to straighten it without deforming the rivets. I pressed it back in, then re-expand countersunk rivets with a punch.

Well, that wasn’t so hard … I was lucky that the problem did not involve fixing the shutter (as you cannot access it from just taking the front of the lens apart).

FD lock … not lock?

Thought I would put this up since I looked into the back of my Canon FD 50mm f/1.8 to see how the lock button worked … as I have never paid much attention to how this actually worked.

Looking at the back of your typical FD lens, and not the breech lock ones ..

DSC00790

The metal securing ring can be taken out after removing the three black screws on the outside of the barrel


DSC00792


You can pull it off


DSC00791


You will probably see that there is a mixture of grease and dirt on that part.


The middle rear cap can be removed by revolving it clockwise until the lump lines up with the release button.

DSC00794

The back of this shows the ring that couples with the aperture arm … than inverted U.

When the lens turns (when you lock it on the body) the U sits in front of the release button … until it lens reaches the end when the release button slips behind it, thus locking.


DSC00795Make sure the release button is not gummed up.


A-1 clean up the view.

While looking through the viewfinder I noted a lot of dust … it was between the viewfinder window and the prism (like the Olympus OM-2 that I worked on).

Ok, now we need to get the top plate off … so we start from the front.

DSC00701First push up AT dial guard, this will reveal the screw that holds to the body.

Remove screw and then remove slide, watch as the two plastic pieces may fall apart.


DSC00702Underneath is a ball bearing. Carefully put that aside.

Unscrew the metal plate, then finally the plastic cover under it.


DSC00703

Now remove lens mount front cover. There are four screws – one on each side, one top, and one bottom … pull off.

Note the buttons on side they might … and in my case also watch out for moths. There happen to be a dead one under this cover.

This will reveal the two hidden screws that hold the top on.

DSC00704Now get to the back.

the viewfinder cover in the middle is glued on, pull off, remove screw, then remove switch lever.

Now we can start to get the top off

DSC00705

DSC00706Unscrew the rewind lever , wrap a little tape, before popping off the e-ring you might want to make  deflection wall around it when the ring springs off into infinity. Then you can remove the dial and washer underneath.


DSC00707Use a rubber grip to remove the ring surrounding the shutter release button. Remove the shutter button, av/tv selector dial, and washer … do not invert camera.

Remove the winding advance cap, copper washer, spring washer, plastic washer, lever, cam


DSC00708There again is another spring clip, metal washer, selector switch, and finally the multi exposure switch.


DSC00709Put some isopropal alchohol on indicator light … then pop off the outer housing pull off

DSC00710The top cover … screws two side, two front, two back … wiggle and slide off, note the wire going to the PC socket.

The viewfinder is held on both sides … two screws … pull out rear finder window.

Clean up the top plate before putting it back on … something I should have mentioned some time ago.

A(-1) shutter problem

Well, I got a hold of a Canon A-1 … not surprising since I just posted a historical note about it … anyway, this camera came with a shutter problem. It appears that it does not trip. For an electronic camera, that is not a good thing since there could possibly be one or more of sooooo many components that is the issue … why I prefer the older mechanical cameras.

OK, so first thing, battery … check camera with fresh battery. Battery check shows good power. I noticed the light meter is working and displaying exposure information in the viewfinder, OK so power is getting through some of the circuit. I noticed that as soon as I pressed the shutter button to take a shot the LED display goes out … hmmm.

OK, now it is time to hunt around the web … well, it appears that there is something obvious to check out … an electromagnet.

Take off the bottom plate.

DSC00698

There are two electromagnets down there … one large one hiding under a plastic cover, and another smaller one on the other side (just follow the red/black wires). The large one is in charge of releasing the mirror and shutter. When the shutter is charged, the trapezoid magnet is pushed against the two metal posts on the electromagnet, where it gets stuck … when the shutter button is pressed, it will send power through the electromagnet that will repulse the magnet and thus release the mirror/shutter mechanism.

You can manually pull them apart to clean out anything that could be causing stickiness between them … but I think the more typical problem is that the electromagnet is not working.

You can electrically short the circuit to send power through the electromagnet, bypassing any electronic issue that is occurring before this in the circuit.

If you look at the flexible printed circuit board, there are two large solder posts beside a screw.  If you short the upper post with the screw (or the contact on the board under it), it will complete the power circuit and should trip open the magnetic contact … if it does not, then the electromagnet needs replacing. In my case that appeared to be the case.

DSC00699 1
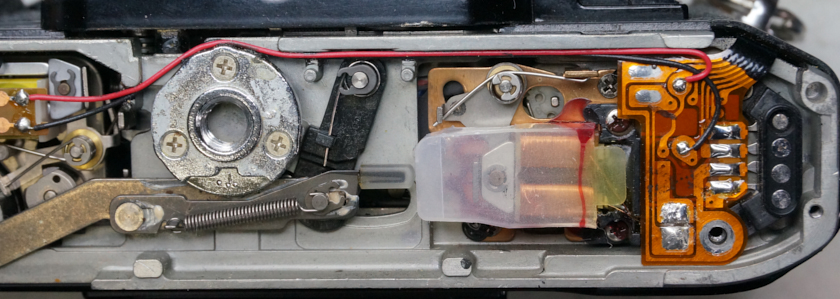
With a handy-dandy soldering iron you can detach it from the flexiboard. I pulled it out and took a look at it (the plastic cover it a bit of a pain to work around, you might want to cut it.)

There were a couple of coil wires that broke … though I am not sure if I did that when trying to take it out (the coil wire is very very small gauge) … anyway, I tried to solder them together (note that coil wire is coated) … but I still do not get any continuity when checking with a multimeter. This must mean there is a break somewhere else (or my soldering skill really sucks).

A query on a forum confirmed that the A’s share the same electromagnet. Sooo, I decided to sacrifice the AE-1 that I just worked to confirm that this is the problem … the Canon AE-1 and AE-1P both (and possibly the AT-1) have the same electromagnet that the A-1 has.

After carefully swapping them out (too much heat can cause the posts to get damaged or disconnected from the coil wire) I now have a working A-1, and a non-working AE-1.

Oh so Populaire.

Well since I just posted a couple of “modern” Canon cameras I thought that there should be another presentation of the olden days … these new fangled techno cameras are just too much sometimes.

In 1959 a “cheap” rangefinder was produced by Canon … P for Populaire. Canon had made 30 LTM cameras before this model (the Canon 7 ended this) and decided to make a V/L-series camera that was most affordable.

In contrast to the Canon A-1, it has no intelligence other than the human behind it … if you have ever had one you would not say it you would not say it is handicapped by it.

Anyway, here is a monochrome image of my P … no, not that kinda peee!!

canonP