<Man thumps chest>


<Man thumps chest>
Since we are on the topic of the Minolta-35 I pulled out an old one, that is my wife’s camera, to check the frame size for Paul. In a way I have become obsessed with this camera … even though I put it off for many years, it has always nagged me that these cameras were sitting on my bench staring at me.
After I looked at the camera for Paul I noticed that the lens (last version) has a loose aperture dial, so I needed to figure out how to take the front apart. I have taken a number of LTR lenses apart and they are not that difficult, just unscrew some stuff from the front and back … this one has proven more challenging.

There is not a lot of info about the innards of this lens … I discovered a Japanese website of someone who took this lens apart to clean and polish it … whoever they are, really likes to take them apart, and took some good images of the bits … but, skips on the details on how the disassembly was done.
OK, so taking some visual clues and translated text I figured out how to get to the loose ring on the front.
5 elements in three groups … the front 3 elements and the 2 rear are encased together … hmm, not sure why I added this.
From the back … hmm, I say that a lot …

Pull out light baffle (not shown in this image as I already took it out).
Unscrew the inside outer locking ring with a spanner wrench. This holds the inner lens body. Watch out for thin metal shims.

The aperture ring has three grub screws. Loosen them and then unscrew the ring towards the back.

The front lens label plate is also secured with three grub screws. Loosen them, and then unscrew the ring towards the front.

Remove front and rear element cells.
The aperture connection ring has a pin screw (the one with the large head) that connects it to the top plate of the aperture section.
Unscrew the pin, then slide the ring off.

The internal aperture section consists of a top plate, blades, and a back cover plate. The back plate is held on internally by three grub screws on the outside.
Loosen them, then nicely push out the innards.

Remove the blades and clean them … I was surprised by the amount of brown stuff that were on these blades and especially around the pins, which is a good reason why do you do not want to just flush a lens with fluid or just clean off the exposed parts … it would have moved the brown stuff all around the inside … and just cleaning the exposed blades does get to the crap hiding under the pins, especially if they are shutter blades as this crud is why the speeds are slow.
The outer body can be taken apart if you want to replace the helicoid grease. Make sure to make alignment marks on ALL parts, as this will wish you had done this when you put it back together.
If you have a focus lever, remove it.

Focus ring … loosen the two outside screws, then remove three top screws.
Pull it off.

The depth field ring is held on by four screws in the back. Slide it forward.
Five grub screws secure the mounting ring to the internal body. Carefully remove them.
Mark the inner outer before pulling it off.

Ok, the last two parts … There is a stopper grub screw that will get revealed when you twist the parts. Remove it and twist off the two parts slowly … note the placement when they separate and mark it, so you know the starting point when you put these two back together.
Tech Tips section:
Have a camera body handy as you can use that to check if you got the helicoid section aligned properly.
Do not force two helix threads to fit eachother … they should want to, otherwise you can damage the threads.
When dealing with ring with the five grub screws, do not use a lot of force on those grubs (or you will break the head and then you will be smashing your head against the work bench) … if you get a lot of resistance then you probably do not have the holes aligned.
When you put the aperture blades back on the rear plate, the centred pin goes down. Have patience and do not use a magnetized tweezer.
Put the aperture section back in with the aperture wide open … the notch aligns to the left side of the opening.
Before tightening grub screws, make sure that the rings move freely.
Oh, and I finally figured out how to use this WP editor with images and text.
Hmmm, Ok … so in today’s world the city of Kyiv means something different than the continuation of the Contax II/III camera … though the Kiev camera line was born from the events of another war.
The Arsenal plant in Kyiv had been around for a while making military equipment, After WWII, part of it converted into a civilian company … this is where the stuff from the Zeiss Ikon Dresden plant were moved to.
This is when the Kiev camera was born. The first Kiev 2 camera mostly used the parts taken from Dresden … then eventually they had to start making their own bits … if you look at the long line of this series you can see that they have not changed that much, until the Kiev 5 in 1972.
I have a Contax II and just recently got a Kiev 2a … comparing the internal parts of the two I can see slight differences in material and build, though most of the bits are identical even though this is the second version.
Another thing they also took along with them was the lenses.
The 50mm Sonnar lens was made by KMZ, and like the Kiev camera, they first used German optical elements taken from Dresden. This lens is called the ЮПИТЕР-8 … also called the Jupiter-8 if you can’t read Cyrillic (in 1962 they did release an export version of the lens that is labeled Jupiter in English).
Around 1949 they ran out of German glass, so they had to redesign the optic formula based on of the type of glass that the Soviets used.
I have one that needs a cleaning, and since I did just clean up the original Zeiss version, this should not be that difficult.
Based on info from SovietCams.com site, I have the the PT3570 version … appears to be the last version before the M version. Released by Arsenal in 1957-1959
This lens is similar in disassembly to the Zeiss 50mm that I just serviced. It is not collapsible … I did not take any pictures but I can describe the main points.
There a a grub screw on the side that needs to be loosened. Then you can unscrew the inner part. Watch for the spacer. The rear cell unscrews. Loosen the grub screw on the securing ring … then remove it. Remove the aperture connecting rod. Slide off the collar. To get the front elements out, loosen the three grub screws on the front ring and unscrew it. When you flip it over, all the stuff will fall out.
Well, I think many know that name … Carl Zeiss, and together with his buddies, Ernest and Otto, created the Carl Zeiss AG company … there is lots to read about these three, so I won’t go into details.
I got a hold of a Contax II, which came with a Carl Zeiss Jena 50mm f/2 collapsible lens. This lens was designed by Dr. Ludwig Bertele for the Contax I … he also made the fastest lens, an f/1.5 Sonnar. Ludwig started as an apprentice working at Rodenstock and moved on to work for Ernemann. Here he produced very fast projector lenses … hmm. When he started working under the Zeiss Ikon name he brought forth the Sonnar.
The collapsible Carl Zeiss Jena 50mm f/2 Sonnar is light, simple, and fast !! The standard lenses on the Contax have no focus helix as it is in the body.
When I got the camera in my hands I can see that it needs some servicing. The lens is dirty and the aperture ring is very hard to turn … it appears that there is a dent in the side, and it probably needs a good cleaning of the old grease.
Ok, so lets get into it … from the back.

With spanner, unscrew rear cell with the outter ring.
The inner one is for the rear element.

Slide the lens mount collar down up towards the front of the lens. This will reveal a large screw and right above it is a grub screw.
The grub screw secures the inner column. Loosen the recessed grub screw … or just take it out.

Now you can unscrew the front inner assembly … hold the rear and turn the front.

… be aware of the spacers. one could be an extremely thin brass one

There is a lower ring … set the aperture to widest then scribe a mark on the ring and upper part.
Loosen tiny grub screw on the lower retaining ring and unscrew the ring.

Remove the large screw that couples to the inner aperture ring.
Now you can slide the aperture dial ring off … notice the grease.
To get the front ring off … loosen the grub screws (not the ones on the aperture dial ring)

Unscrew the front ring.

The inner front cell assembly will fall out when inverted.
The aperture is secured with a c-clip. Squeeze the ring together to release it and then nicely push out the aperture section out from the bottom.
Clean up those blades.
Well, I had done some cleaning on a Chiyoko Super Rokkor 5cm f/2 LTM lens … and I did not take any pictures.
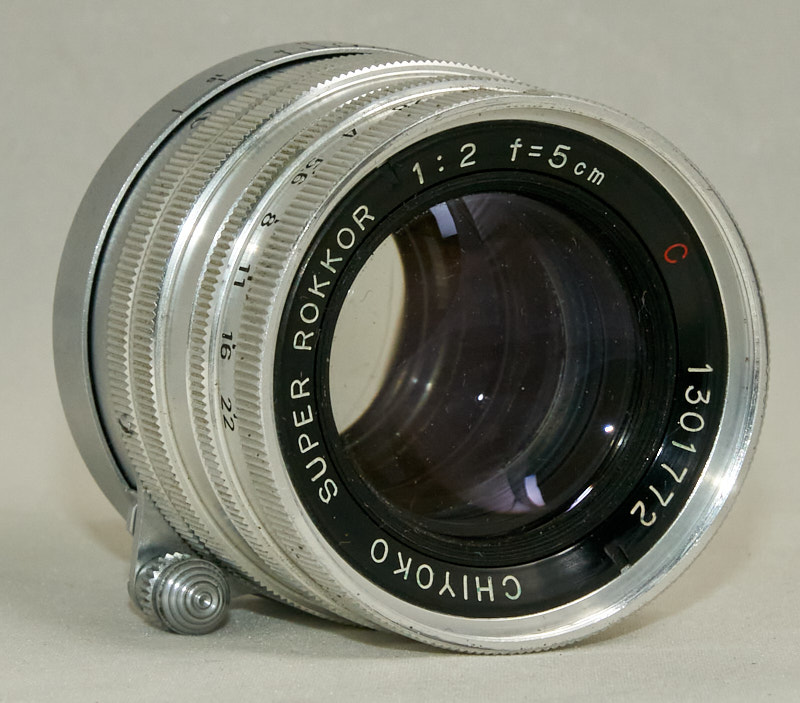
So, I will just have to describe some things about it.
Like most LTM lenses the disassembly is quite similar … there is a ring in the back that unscrews to release the inner unit from the focus mechanism. The lens elements and groups are held in by ring screws or the casing is threaded.
What is a bit different on this lens are the “containers”. With most lenses each element or cell group is secured by a ring screw … hmm, this Chiyoko lens gave me a surprise.
Minolta decided not to do this … this lens has encased the elements into three brass tubes. The front two elements, second two (stacked), and the last three. They are secured in place by a single front (name ring) and rear screw ring.
Hmm, odd design … especially since it required very precise milling as they are not easily removed.
